What you’ll build
In this guide, we will walk you through what you will need to set up webhooks:- Create your endpoint to receive webhook events
- Register your endpoint with Chart
- Process the events received from Chart
- Test your endpoint
1. Set up your webhook endpoint
Create a public endpoint that Chart can send events to. This endpoint should use HTTPS and should accept POST requests with thechart-signature header.
Chart sends the header as Chart-Signature, but many web servers normalize HTTP
request headers to their lowercase variants.
2. Register your endpoint
Set and save the webhook URL in the Chart Dashboard, so Chart knows where to deliver the events. Your webhook endpoints should only be configured to receive the ones required by your integration. Receiving all event types can put undue strain on your servers and is not recommended.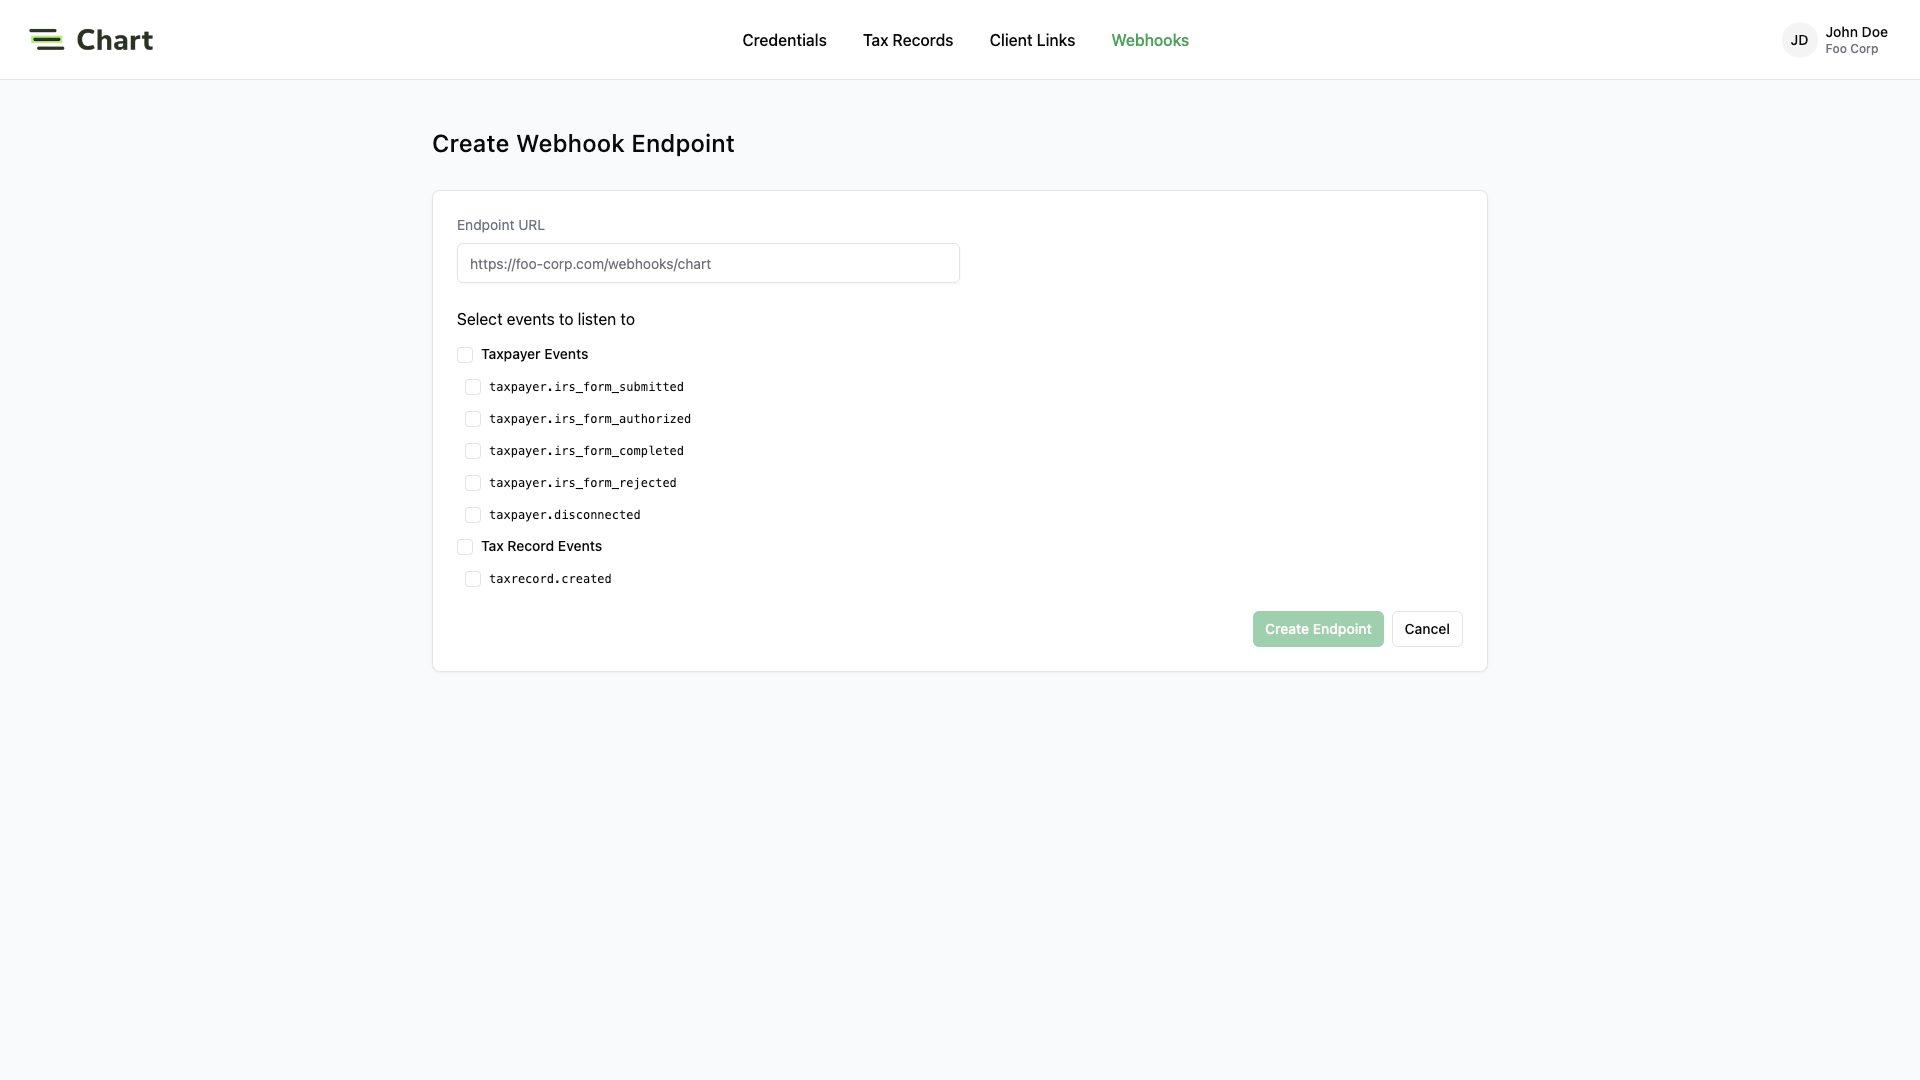
3. Process the events
In order to avoid unnecessary retry requests hitting your webhook handler, we recommend using two concurrent processes for handling events: one for receiving the event, and the other for processing it.Respond with HTTP 200 OK
On receiving an event, you should respond with anHTTP 200 OK to signal to Chart that the event was successfully delivered.
Otherwise, Chart will consider the event delivery a failure and retry up to 12 times, with exponential backoff over 3 days.
You do not need to signal to Chart whether or not the event was processed successfully.
Validate the requests
Before processing the request payload, verify the request was sent by Chart and not an unknown party. Chart includes a unique signature in each webhook request that it sends, allowing you to verify the authenticity of the request. In order to verify this signature, you must obtain the secret that is generated for you when you set up your webhook endpoint in the Chart dashboard. Ensure that this secret is stored securely on your webhook endpoint server as an environment variable. To implement webhook validation, you’ll need to use the following steps: First, extract the timestamp and signature from the header. There are two values to parse from theChart-Signatureheader, delimited by a , character.
| Key | Value |
|---|---|
| issued_timestamp | The number of milliseconds since the epoch time at which the event was issued, prefixed by t= |
| signature_hash | The HMAC SHA256 hashed signature for the request, prefixed by v1= |
issued_timestamp does not differ too much from the current time.
Next, construct the expected signature. The expected signature is computed from the concatenation of:
issued_timestamp- The
.character - The request’s body as a utf-8 decoded string
4. Test your endpoint
From the dashboard, you can send test webhook events after configuring an endpoint. Go to the webhook endpoint detail page, click on Send Test Event. The types of events that you have configured for your endpoint are available for you to send sample payloads.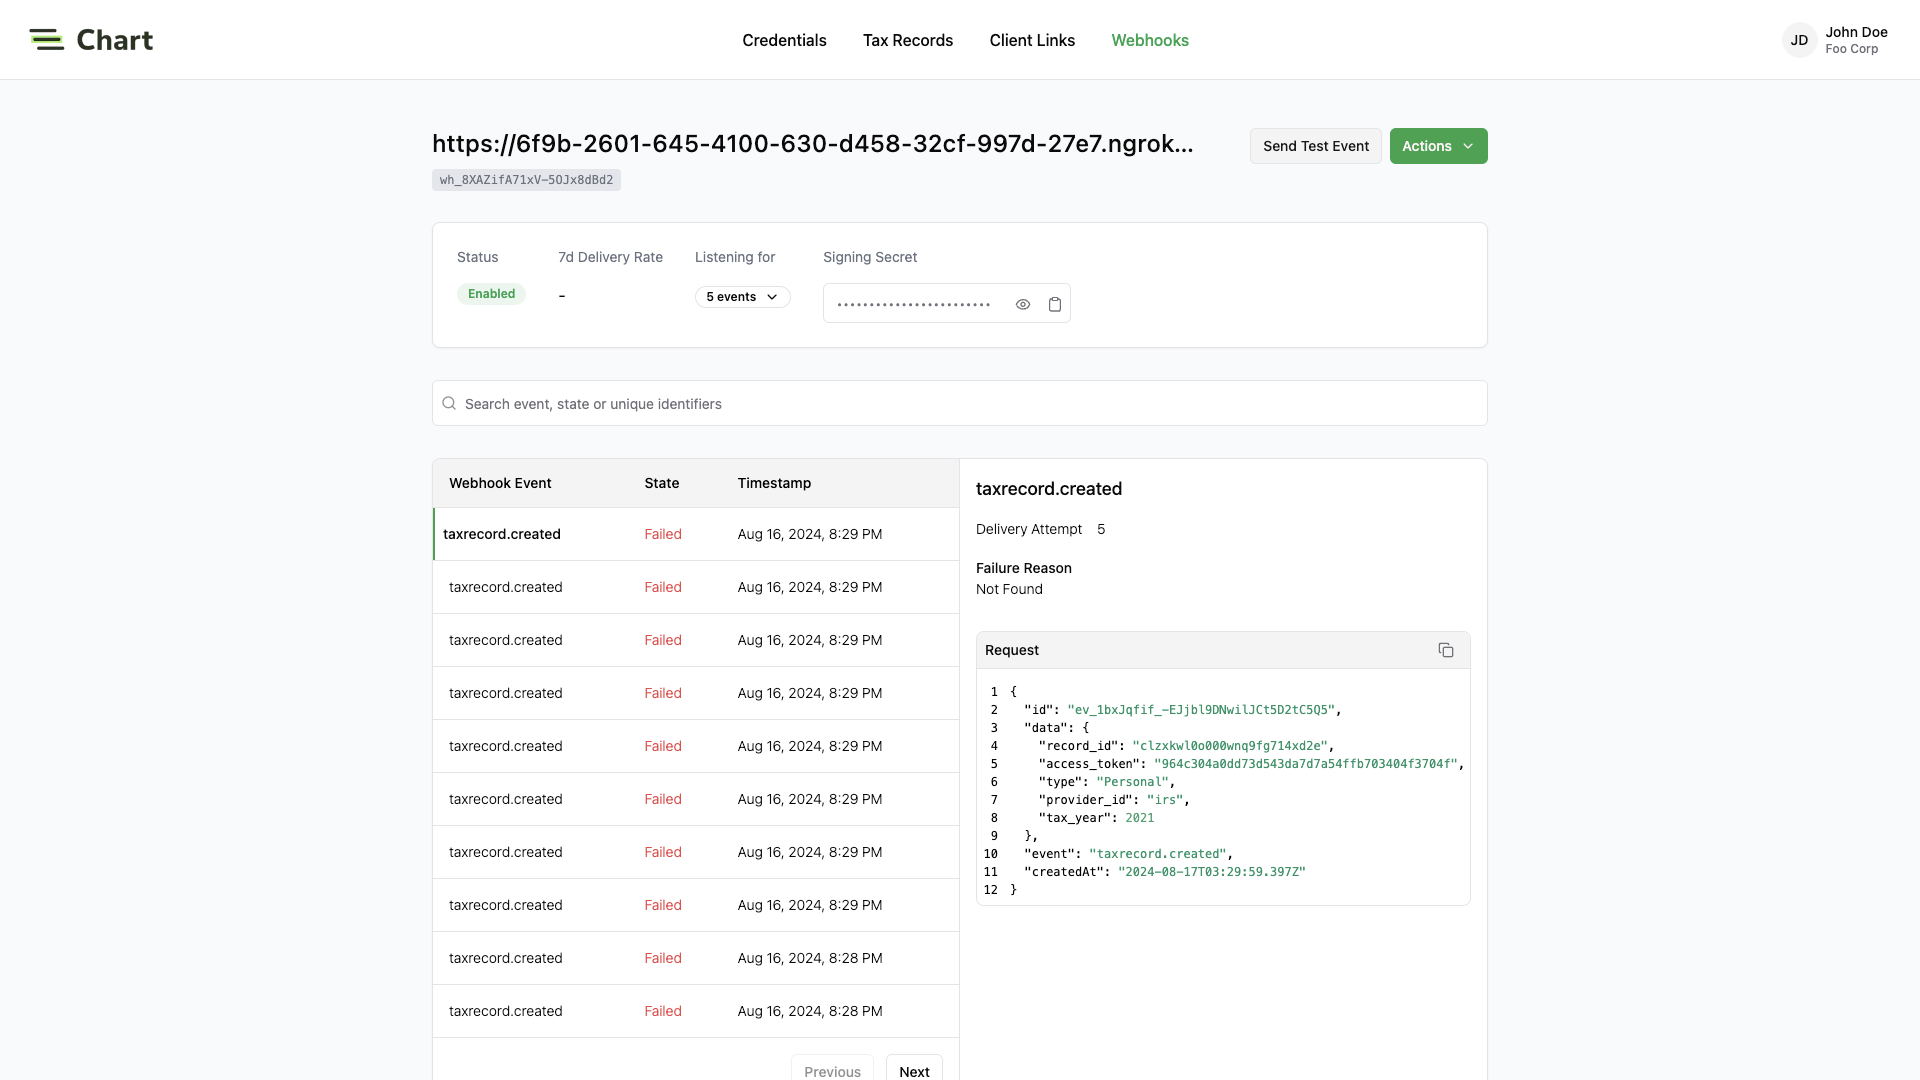
Best practices
Respond to events immediately
To avoid webhook requests potentially stressing your system, Chart strongly recommends that you respond to a webhook request with a 200 OK response as quickly as possible once received. If you process the event before responding, your system may not be able to handle a spike of requests. This may cause requests to timeout and result in missing important updates. A common pattern is to store the request payload on a message queue, respond with a 200 OK response, and use a background worker to process the messages in the queue.Recover from failed events
If your endpoint fails to respond to a webhook request with a2xx response,
Chart will automatically retry the event with exponential back-off for up to 3 days in production environments.
If for some reason your endpoint is still unable to respond successfully to events during that period,
the event will be considered failed, and we will no longer retry sending it.
Handle out-of-sequence events
Chart does not guarantee that events are delivered in the same sequence that they are generated. For example, when a taxpayer going thru Chart Connect UI, you may receive:taxpayer.consent_acceptedtaxpayer.provider_selectedtaxpayer.provider_connected
created_at field and an updated_at field.