> ## Documentation Index
> Fetch the complete documentation index at: https://developer.trychart.com/llms.txt
> Use this file to discover all available pages before exploring further.
# Create a Chart Developer Account
> Create your Chart Developer Account, recieve your application credentials, and pilot how Chart works.
To get started using the Chart APIs, sign up for a free Chart Developer account
to receive application credentials (a `client_id` and `client_secret`) and pilot how Chart works.
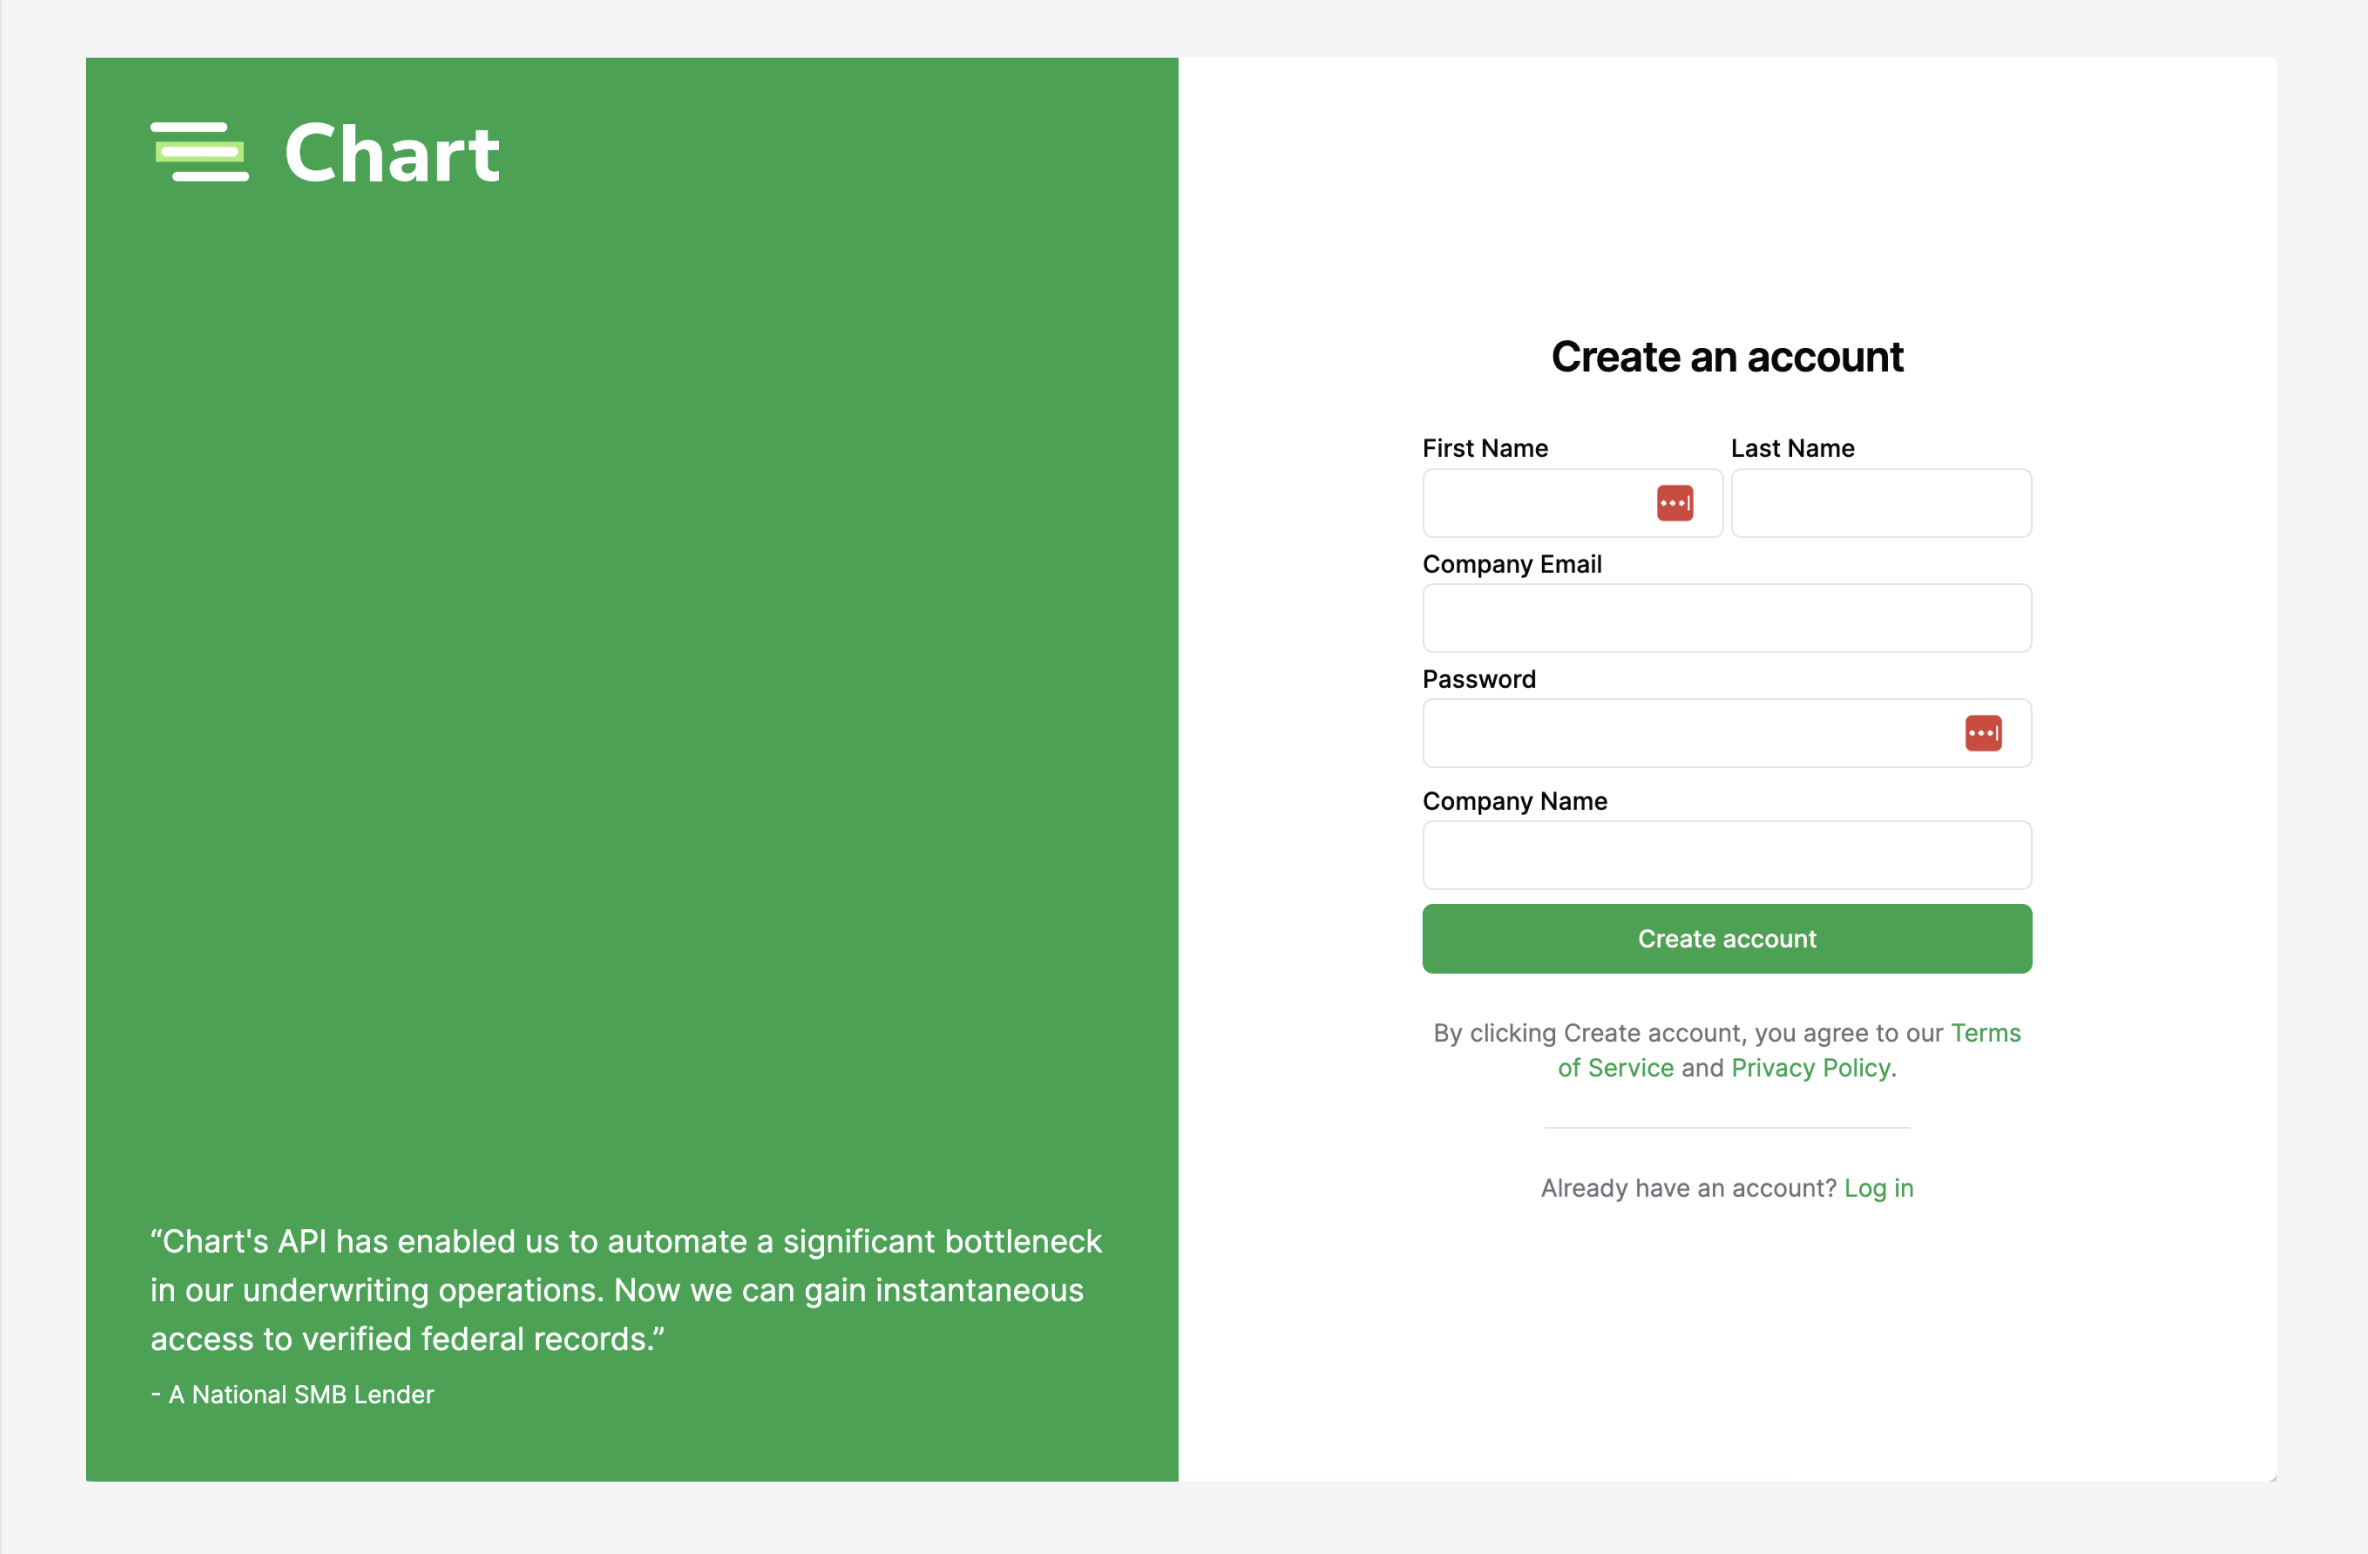 1. Go to the [Chart Developer Dashboard](https://dashboard.trychart.com) and sign up for a new account.
You'll need to provide your name, company name, email address, and create a password.
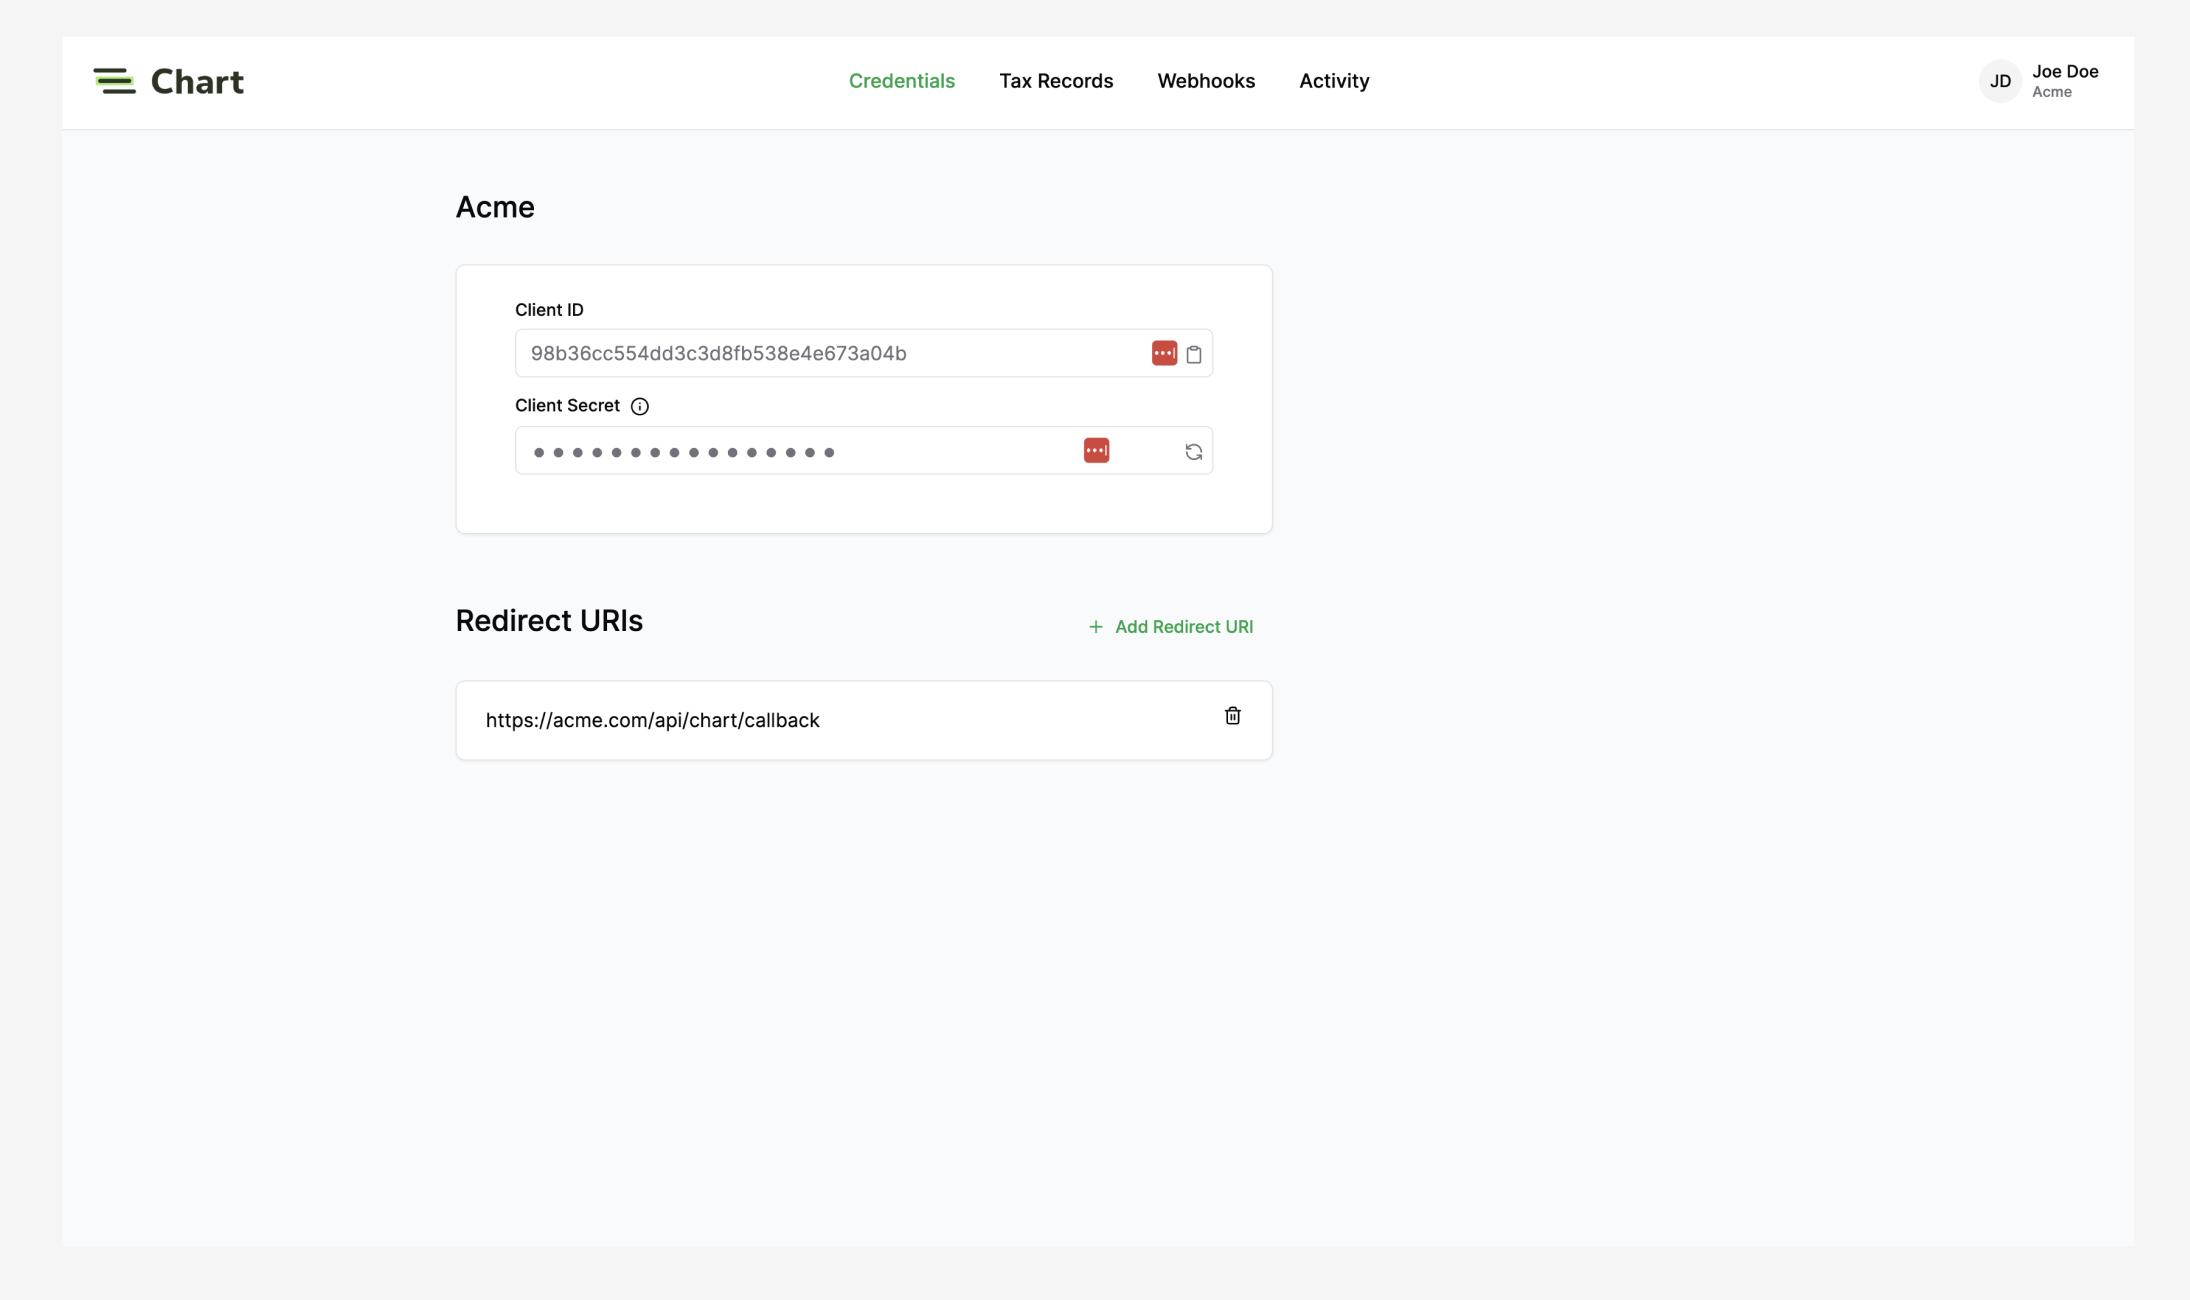
2. Upon creating the application, you'll be provided with a `client_id` and `client_secret`.
You will use these credentials to authenticate your application to obtain access tokens in order to call the Chart APIs.
3. Set up a secure method for storing your `client_id`, `client_secret`, and future `access_token`s
to prevent unauthorized access. Here are some methods to securely store these credentials: - **Environment Variables**: Store your `client_id` and `client_secret` as environment variables within your application.
When your application needs to use these credentials, it can access them from the environment variables
without exposing them in your source code. - **Secure Database**: [Store the access tokens](/implementation/secure/store) in a secure database with proper encryption and access controls in place.
Make sure to use a database that supports encryption at rest and in transit to ensure the security of the stored tokens. - **Secrets Management Solutions**: Utilize a specialized secrets management solution, such as HashiCorp Vault or AWS Secrets Manager.
These tools provide additional layers of security, access control, and auditing capabilities
to ensure the safe storage of your `client_id`, `client_secret`, and `access_token`. - When storing access tokens, also store any relevant metadata, such as the associated user ID.
This will help you maintain data integrity and prevent mixing up tokens across different users.
This topic is covered in more detail in [Store Tokens](/implementation/secure/store).
4. (Optional) if you are using the [Chart Connect Redirect Flow](/implementation/connect/set-up-chart-connect#redirect-to-chart-connect),
specify any [Redirect URIs](#redirect-uris) for your application. This URL must be hosted on your own server or a trusted domain.
Example: `https://your-trusted-domain.com/api/chart/callback`
The [Chart Developer Dashboard](https://dashboard.trychart.com) is your centralized place to manage submitted tax records, review request activity, and set up webhook alerts.
1. Go to the [Chart Developer Dashboard](https://dashboard.trychart.com) and sign up for a new account.
You'll need to provide your name, company name, email address, and create a password.
2. Upon creating the application, you'll be provided with a `client_id` and `client_secret`.
You will use these credentials to authenticate your application to obtain access tokens in order to call the Chart APIs.
3. Set up a secure method for storing your `client_id`, `client_secret`, and future `access_token`s
to prevent unauthorized access. Here are some methods to securely store these credentials: - **Environment Variables**: Store your `client_id` and `client_secret` as environment variables within your application.
When your application needs to use these credentials, it can access them from the environment variables
without exposing them in your source code. - **Secure Database**: [Store the access tokens](/implementation/secure/store) in a secure database with proper encryption and access controls in place.
Make sure to use a database that supports encryption at rest and in transit to ensure the security of the stored tokens. - **Secrets Management Solutions**: Utilize a specialized secrets management solution, such as HashiCorp Vault or AWS Secrets Manager.
These tools provide additional layers of security, access control, and auditing capabilities
to ensure the safe storage of your `client_id`, `client_secret`, and `access_token`. - When storing access tokens, also store any relevant metadata, such as the associated user ID.
This will help you maintain data integrity and prevent mixing up tokens across different users.
This topic is covered in more detail in [Store Tokens](/implementation/secure/store).
4. (Optional) if you are using the [Chart Connect Redirect Flow](/implementation/connect/set-up-chart-connect#redirect-to-chart-connect),
specify any [Redirect URIs](#redirect-uris) for your application. This URL must be hosted on your own server or a trusted domain.
Example: `https://your-trusted-domain.com/api/chart/callback`
The [Chart Developer Dashboard](https://dashboard.trychart.com) is your centralized place to manage submitted tax records, review request activity, and set up webhook alerts.
 ## Redirect URIs
To authorize with Chart, you'll need to provide one or more redirect URIs.
The user will be redirected to the specified URI upon successfully authorizing your application
access to their tax system. On redirect, the URI will contain an authorization `code` query parameter
that must be exchanged with Chart's authorization server for an access token.
Chart's embedded Frontend SDKs don't need to set up a redirect URI.
The default redirect URI `https://trychart.com` is already applied.
The redirect URIs must match one of the following formats—
| Protocol | Format | Examples |
| -------- | --------------------------------------- | ----------------------- |
| HTTP | A localhost URI with protocol `http://` | `http://localhost:8000` |
| HTTPS | A URI with protocol `https://` | `https://example.com` |
## Checkpoint + Next Step
After completing this step, you should have registered for a Chart Developer
Dashboard account using your unique `client_id` and `client_secret`. You now
have everything necessary to [Set Up Chart
Connect](/implementation/connect/set-up-chart-connect) to begin connecting to
tax providers.
## Redirect URIs
To authorize with Chart, you'll need to provide one or more redirect URIs.
The user will be redirected to the specified URI upon successfully authorizing your application
access to their tax system. On redirect, the URI will contain an authorization `code` query parameter
that must be exchanged with Chart's authorization server for an access token.
Chart's embedded Frontend SDKs don't need to set up a redirect URI.
The default redirect URI `https://trychart.com` is already applied.
The redirect URIs must match one of the following formats—
| Protocol | Format | Examples |
| -------- | --------------------------------------- | ----------------------- |
| HTTP | A localhost URI with protocol `http://` | `http://localhost:8000` |
| HTTPS | A URI with protocol `https://` | `https://example.com` |
## Checkpoint + Next Step
After completing this step, you should have registered for a Chart Developer
Dashboard account using your unique `client_id` and `client_secret`. You now
have everything necessary to [Set Up Chart
Connect](/implementation/connect/set-up-chart-connect) to begin connecting to
tax providers.